
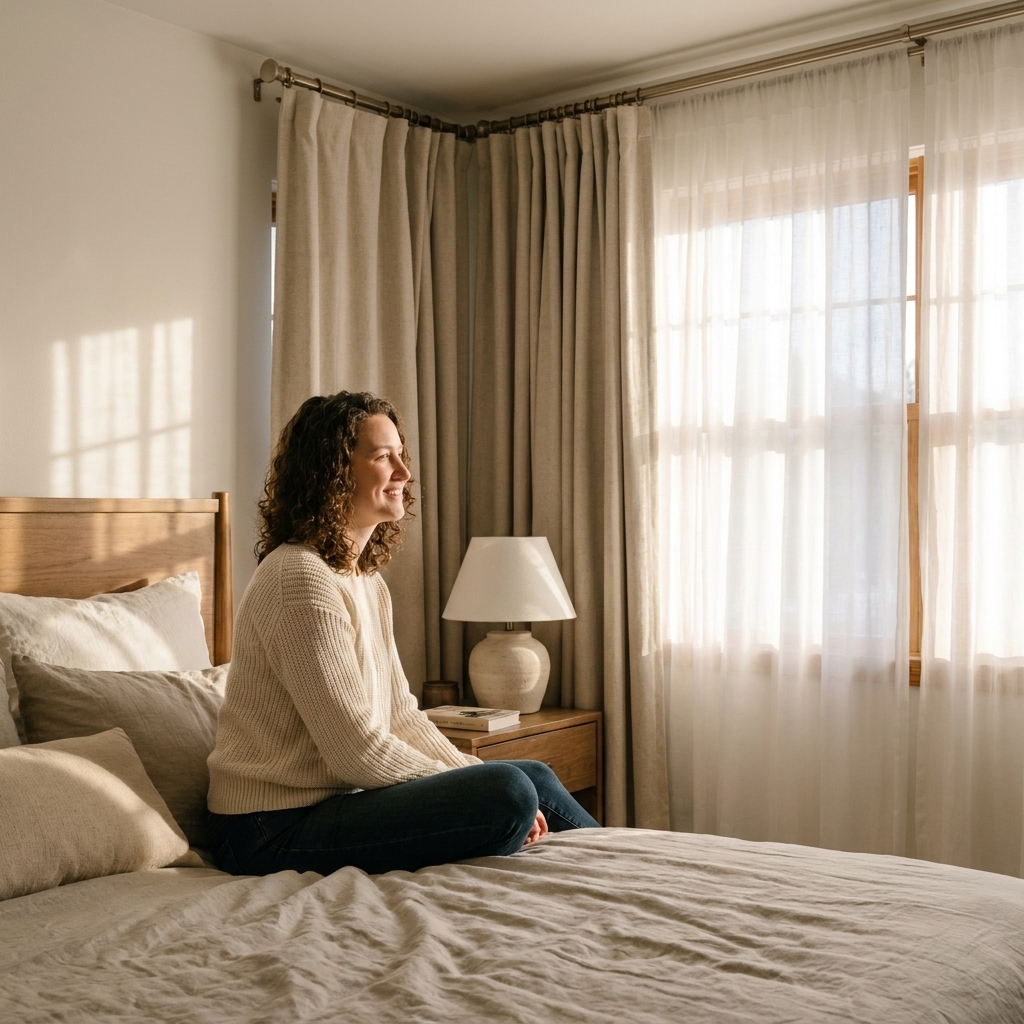
There is something instantly calming about a bedroom window that looks finished. Not fussy, not over-styled, just softly layered like a well-made bed. Pairing sheers with blackout curtains is my favorite way to get the best of both worlds: dreamy daylight when you want it and a true sleep cave when you do not.
This is one of those upgrades that makes a room feel more expensive without actually spending a fortune, especially if you thrift your outer panels or grab budget-friendly blackout liners.
Why this combo works in bedrooms
Sheers and blackout curtains solve different problems, and together they create a window setup that feels flexible all day.
- Soft daylight without feeling exposed: Sheers diffuse harsh sun and blur the view in, so the room stays bright but private.
- More darkness for sleep: Blackout panels can dramatically cut light from streetlamps and early sunrise, especially when the panels fit well and you minimize gaps at the top and sides.
- Better temperature comfort: Heavier drapes can add a bit of insulation and help with drafty windows or strong afternoon sun, but results vary by fabric and fit.
- Instant “finished” look: The layers add depth and texture the same way a duvet plus throw plus pillows does on the bed.
Also, if you have kids, night-shift schedules, or a partner who needs daytime darkness, this setup lets you keep the room airy during the day and properly dim when it counts.
Pick your layering setup
There are three main ways to combine sheers and blackout curtains. The best choice depends on how much control you want and what your wall can handle.
Option 1: Double curtain rod (my go-to)
A double rod gives you the cleanest, easiest everyday use. Sheers go on the rod closest to the window. Blackouts go on the front rod.
- Best for: Anyone who opens and closes curtains daily.
- Look: Polished, hotel-like, layered on purpose.
Option 2: Single rod plus blackout liner
If you already have one rod installed, you can hang sheers and blackout panels together, or you can add blackout liners to your existing decorative curtains.
- Best for: Tight budgets, minimal drilling, windows where you want one smooth stack-back.
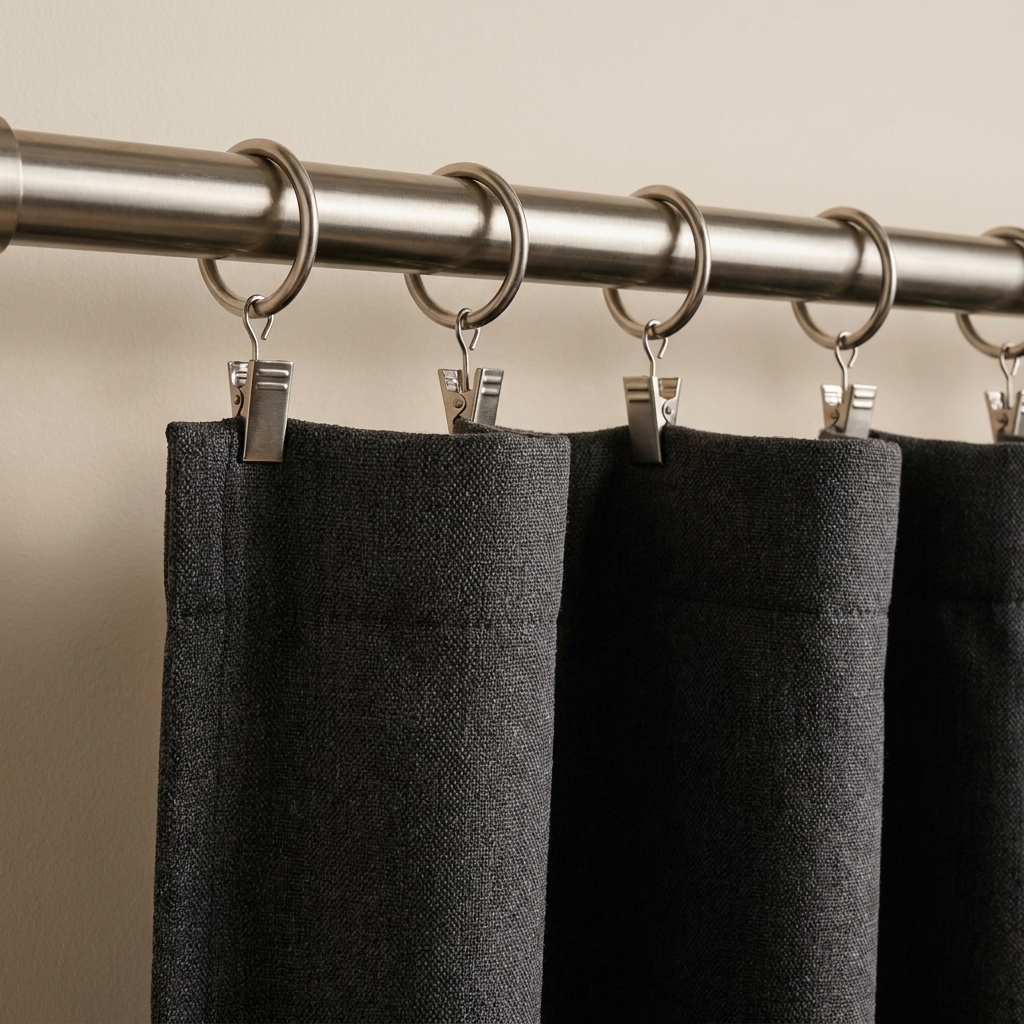
- Pro tip: Clip rings make this much less annoying because everything glides instead of bunching.
Option 3: Sheers plus a blackout shade
This is the solution I use when I want a very tailored look. The shade does the hard work (darkness). The sheers add softness.
- Best for: Small bedrooms, modern spaces, windows with radiators or furniture close underneath.
- Bonus: You can keep the shade down for privacy and still enjoy filtered light through the sheers.
Measure for an intentional look
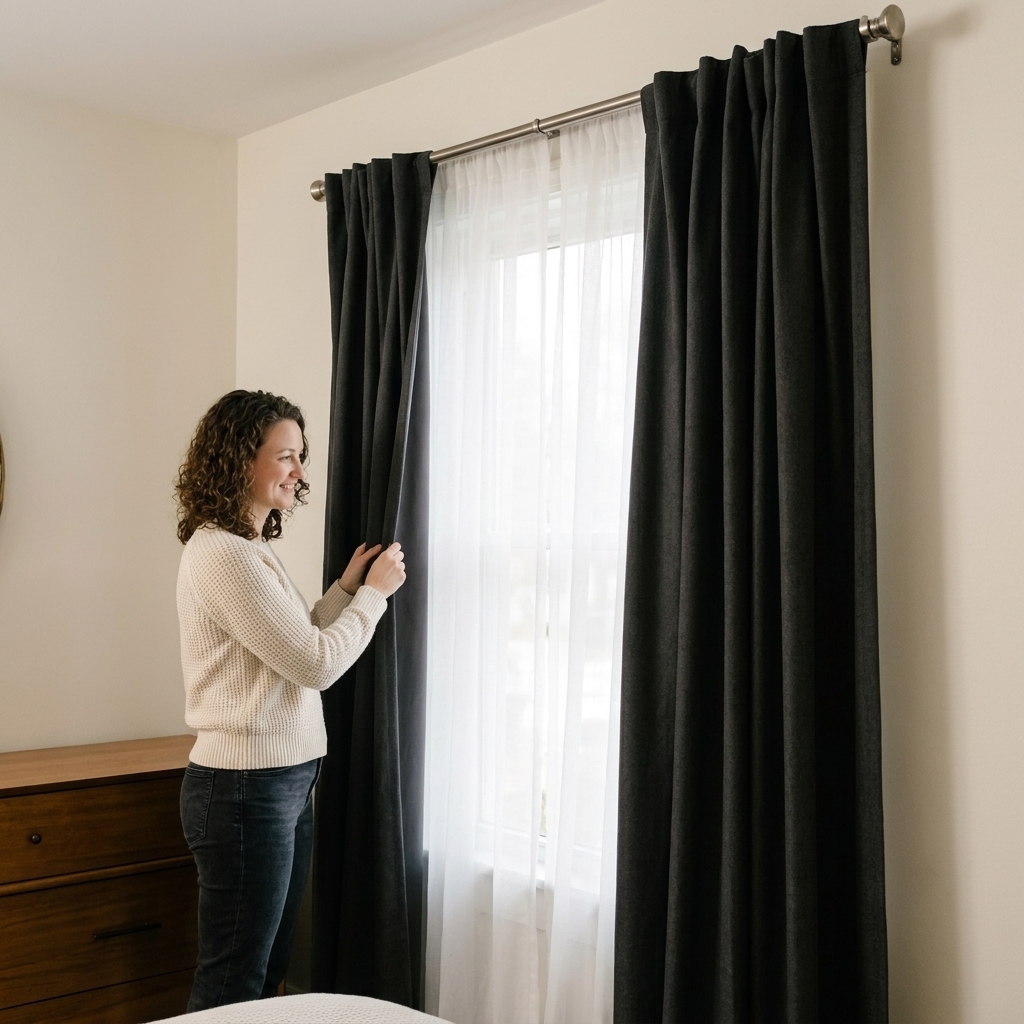
Most window treatment frustration comes down to two things: the rod is hung too low, or the panels are too skimpy. Here is the cheat sheet I give friends when they text me from the aisle.
Hang the rod high
- Mount the rod 4 to 8 inches above the window frame, or as close to the ceiling as makes sense for your room.
- If your ceiling is low, going higher often makes the room feel taller. Just keep it practical: do not crowd crown molding, and make sure your panels are still long enough to reach the floor.
Go wider than the window
- Extend the rod 6 to 12 inches past each side of the window.
- This lets you pull blackout curtains fully off the glass so the sheers can do their light-diffusing job.
Get the fullness right
Fullness is what keeps sheers from looking like two sad napkins and keeps blackout curtains from looking like a flat sheet.
- Sheers: Aim for 2x the window width (or even 2.5x if you love a romantic ripple).
- Blackouts: Aim for 1.5x to 2x the window width so they overlap in the center and do not gap.
Quick example: For a 36-inch-wide window, aim for about 72 inches of sheer width total (for example, two 36-inch panels), and 54 to 72 inches of blackout width total depending on how plush you want the folds.
Choose a hem length on purpose
- Float: Hem ends about 1/2 inch above the floor. Easiest for vacuuming and pets.
- Kiss: Just barely touches the floor. My favorite balance of tidy and luxe.
- Puddle: Extra 1 to 3 inches on the floor. Very cozy, but a dust magnet.
Takeaway: High and wide rods plus enough fabric is the difference between “hung up” and “designed.”
Fabrics and opacity
I like to think of sheers as your “daytime glow” layer and blackout curtains as your “sleep and cozy” layer.
Sheers: look for softness
- Voile: Light and classic, often the most affordable.
- Linen or linen-blend: Slight texture, elevated and relaxed. Great for warm, natural bedrooms.
- Cotton gauze: A little more casual, a little more cloud-like.
Care note: Cotton and linen can shrink. If you are buying unwashed natural fabrics, check the label before laundering, and do not hem anything until you know how it behaves.
Blackout curtains: blackout vs room-darkening
Brands use these terms loosely, so check details. The “blackout” result usually comes down to fabric backing plus fit (and how well you deal with gaps).
- True blackout: Best for light sleepers, nursery-style darkness, streetlights outside your window.
- Room-darkening: Softer dimming, often drapes better, usually cheaper.
If you thrift gorgeous drapes that are not blackout, add blackout liners. It is one of my favorite budget tricks because you get the vintage texture you love with the function you need.
One more thing: this combo is mainly about light control. Any noise reduction is usually modest unless you are using very heavy fabric and sealing gaps.
Color combos that feel calm
If you want the layered look to feel serene instead of busy, keep one layer quiet and let the other do the talking.
My favorite pairings
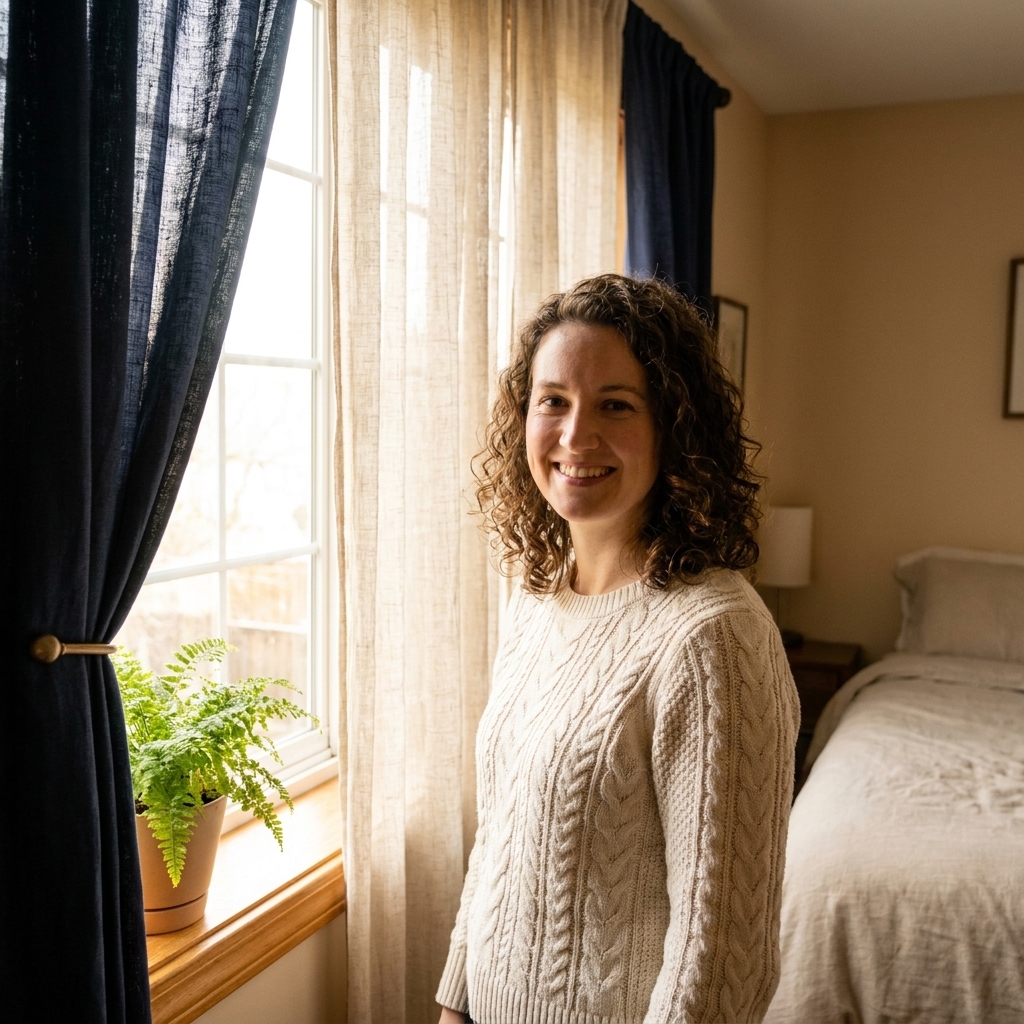
- Crisp white sheers + warm beige blackout: Timeless, glowy, and forgiving with any bedding color.
- Ivory sheers + dusty sage blackout: Soft, nature-inspired, especially pretty with linen bedding.
- White sheers + charcoal blackout: Modern and moody, great if you like a hotel feel.
- Natural flax sheers + deep navy blackout: Cozy and tailored, perfect for classic or coastal bedrooms.
Match undertones
Quick rule: pair warm with warm (cream, camel, terracotta) and cool with cool (bright white, gray, icy blues). It is a small detail that makes the layers look like they belong together.
Repeat the curtain color
A tiny echo makes the whole room feel styled. Try a throw pillow, a knit blanket, a lampshade, or even a framed print with the same tone as your blackout panels.
More blackout, less bulk
If you love an airy bedroom but still need darkness at night, you can keep the outer drapes lighter and let the hidden layer do the work.
- Use blackout liners behind “pretty” curtains: Especially good if you fall in love with velvet, vintage floral, or linen-look panels that are not functional on their own.
- Try a blackout roller shade under sheers: It disappears during the day and feels clean and minimal.
- Seal the light gaps: Even great blackout curtains can leak light at the sides. A wider rod helps, and so do wraparound curtain rods or magnetic edges if you are determined.
Hardware that makes it easy
The right hardware is the difference between a setup you actually use and a setup you avoid touching.
Rings vs grommets vs rod pockets
- Clip rings: My top choice for layering. They glide smoothly and make hemming easier because you can adjust slightly.
- Ring top (sewn rings): Polished and easy to slide, a bit more structured.
- Grommets: Easy and modern, but sometimes too casual for romantic sheers.
- Rod pocket: Can look soft and pretty, but it is the hardest to open and close daily.
Rod strength matters
Blackout curtains are heavier. Make sure your rod feels sturdy and your brackets are anchored well. If you have drywall, use appropriate anchors and do not skimp here, especially if you are hanging long panels.
Renter-friendly options
I rented for years and treated every hole like it was a major life decision, so I get it. You still have options.
- Tension rod for sheers: Place it inside the window frame for a simple sheer layer, then hang blackout curtains on an outer rod (drilled or adhesive brackets depending on your walls).
- Twist-and-fit curtain rods: Some pressure-mounted rods can handle lightweight panels, but always check the weight rating and test for slip. A falling rod can damage trim, break a shade, or bonk you in the middle of the night.
- Blackout shade + sheers: A stick-on or inside-mount shade paired with curtain panels can minimize wall hardware.
If your landlord allows small holes, a standard double rod is usually an easy patch later with spackle and paint.
Troubleshooting
“My curtains still let light in.”
- Widen the rod so panels sit mostly on the wall when open and overlap more when closed.
- Choose wraparound rods or add a blackout shade underneath for closer-to-total darkness.
- Make sure panels are wide enough to overlap in the middle.
“The layers look bulky.”
- Use a double rod with more space between rods.
- Choose lighter blackout fabric or use liners instead of thick, heavily textured panels.
- Go with a blackout shade plus sheers to slim down the look.
“My sheers look limp.”
- Add fullness. In my experience, this is the fix most people need.
- Steam them. Freshly steamed sheers look instantly more expensive.
“The curtains pool and look messy.”
- Use clip rings to lift the hem slightly.
- Iron-on hem tape is a quick, no-sew fix if you want a clean float.
My simple window formula
If you want a no-stress plan, here is the setup I reach for again and again:
- White or ivory sheers on the inner rod, 2x fullness, floor-length.
- Warm neutral blackout curtains on the outer rod, 1.5x to 2x fullness, floor-length.
- Rod mounted high and wide to make the window look bigger and help reduce light leaks at night.
It is the window-treatment version of a perfectly layered bed: breathable base layer, cozy top layer, and the option to adjust depending on the day.
FAQ
Should sheers go in front of or behind blackout curtains?
Behind, almost always. Sheers closest to the window diffuse daylight nicely, while blackout curtains on the front rod give you full coverage at night.
Can I put sheers and blackout curtains on the same rod?
Yes. Use clip rings for smoother movement, or pair sheers with blackout liners so you are not fighting multiple thick layers on one rod.
What if my blackout curtains are too long?
Clip rings can buy you a little height. For a cleaner fix, use iron-on hem tape or a simple hem stitch. I avoid cutting until I have lived with the length for a few days.
Do I need blackout curtains if I already have blinds?
If your blinds are light-filtering, blackout curtains will still make a noticeable difference for sleep. If you have a true blackout shade, you can keep the outer curtains decorative and lighter weight.